
Table of Contents
ToggleMost Dyson owners know the drill: suction starts dropping, the machine sounds strained, and suddenly that cleaning session takes twice as long. Nine times out of ten, the culprit is a full bin. Learning how to empty a Dyson vacuum properly keeps performance sharp and prevents dust from turning into a maintenance headache. Whether you’re figuring out how to open a Dyson vacuum canister on a stick model or wrestling with an upright bin, the process is straightforward once you know the release points and avoid common mistakes. This guide covers every Dyson type, cordless sticks, uprights, and canisters, so you can get back to cleaning without the guesswork.
Key Takeaways
- Empty your Dyson vacuum when the bin is about two-thirds full to maintain suction and prevent motor strain, rather than waiting until it reaches the MAX line.
- How to empty a Dyson vacuum varies by model: cordless sticks use a red lever release, uprights use a single-button system, and canisters use a pull-tab mechanism—all require holding the vacuum over a trash bin and letting gravity do the work.
- Always empty your Dyson outdoors when possible, wear a dust mask if you have allergies, and avoid shaking or banging the vacuum to prevent damage to precision-balanced cyclone components.
- Clean your Dyson bin monthly by rinsing with lukewarm water and a soft brush, then air-dry for at least 24 hours before reinstalling to prevent odor, mold growth, and motor corrosion.
- Check the bin seal, cyclone shroud, and filter for debris, clogs, or damage after each use to catch issues early and maintain peak performance.
When Should You Empty Your Dyson Vacuum?
Dyson recommends emptying the bin when debris reaches the MAX line, but waiting that long can cost you suction. Dust compresses as you vacuum, and overfilling forces the motor to work harder, which shortens its lifespan and overheats cyclone components.
Empty the bin when it’s about two-thirds full, especially if you’re picking up fine dust, pet hair, or drywall powder. These materials clog filters and cyclone ports faster than larger debris. If you’re tackling a big cleanup (renovation dust, workshop sawdust, or post-sanding mess), plan to empty mid-job.
You’ll also want to empty the bin before storing the vacuum for more than a week. Trapped moisture and organic material can develop odors or promote mold growth inside the bin, particularly in humid climates. A quick dump after every use isn’t overkill if you’re dealing with pet dander or allergen control, it keeps the filtration system cleaner and reduces maintenance intervals.
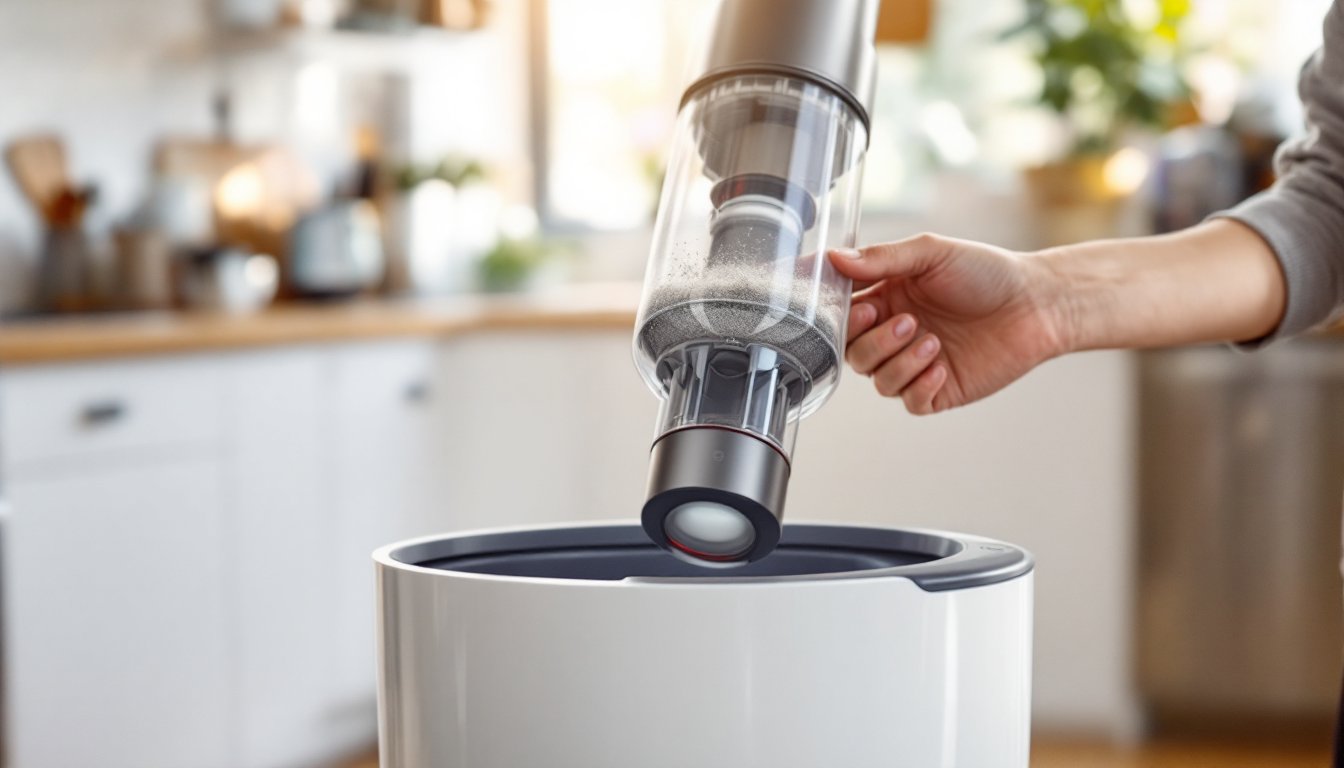
How to Empty a Dyson Cordless Stick Vacuum
Cordless models like the V7, V8, V10, V11, V12, and V15 share a similar bin-release mechanism, though the button location varies slightly. If you’re wondering how to empty a Dyson vacuum V11 specifically, the process is identical to most stick models.
Step-by-step:
- Detach the vacuum from the charging dock (if wall-mounted) or power it off.
- Locate the red bin-release lever near the cyclone assembly. On most models, it’s at the top of the clear bin, just below the handle.
- Hold the vacuum over a trash bin, ideally one that’s tall enough to catch the debris without spillover. Outdoor emptying is smart if you’re dumping fine dust or allergens.
- Pull the red lever down firmly. The bin floor will drop open, releasing debris in one motion. Don’t shake or tap the vacuum, gravity does the work.
- Close the bin door by pushing it back up until it clicks. Verify the seal is flush: a loose door triggers the “bin full” indicator light even when it’s empty.
- Reattach the bin to the main body if you removed it (some users prefer to work with the bin detached for better control).
For stubborn clumps (pet hair wrapped around the cyclone shroud or compacted dust), use a dry microfiber cloth or a soft brush to dislodge debris after the main dump. Avoid rinsing the bin with water unless you’re doing a full maintenance clean, moisture left inside can damage electronics and promote odor.
How to Empty a Dyson Upright Vacuum
Dyson uprights (Ball Animal, Ball Multi Floor, Small Ball, and older DC-series models) use a single-button release system that’s designed for one-handed operation. Knowing how to open the Dyson vacuum to empty it properly prevents dust puffback and broken latches.
Step-by-step:
- Turn off and unplug the vacuum. This isn’t a live-circuit risk, but it prevents accidental motor engagement if you bump the power switch.
- Carry the vacuum to your trash bin or take it outside. Hold it by the handle with the bin positioned over the opening.
- Press the red bin-release button on top of the clear cylinder. On Ball models, it’s centered on the bin lid. On DC-series models, it may be on the side near the cyclone pack.
- The bin base will swing open. Keep the vacuum angled slightly downward so debris falls cleanly. Some users tap the side of the bin gently to dislodge compacted material, but aggressive shaking can damage the cyclone seals.
- Close the bin base by pushing it up until you hear a click. Check that the red button pops back into the locked position.
- Inspect the bin seal, a rubber gasket around the bin opening. If it’s cracked or debris-coated, wipe it down. A compromised seal reduces suction and triggers error lights on newer models.
Upright bins accumulate more fine dust around the cyclone entry ports than stick models, so consider a monthly rinse (with the bin fully dried before reinstalling). Regular maintenance habits similar to those recommended by home care experts help prevent clogs and extend motor life.
How to Empty a Dyson Canister Vacuum
Canister models (Dyson Big Ball, Cinetic Big Ball, and DC-series canisters) handle larger debris loads and feature a pull-tab bin release instead of a button. Understanding how to open a Dyson vacuum canister correctly keeps dust contained.
Step-by-step:
- Turn off the vacuum and retract the power cord fully to prevent tripping hazards.
- Locate the clear bin on the front or top of the canister body. The release mechanism is usually a red tab or lever at the top of the bin.
- Position the canister over your trash receptacle. For best results, use a large contractor bag or outdoor bin, canister models hold more volume, so expect a bigger dust cloud.
- Pull the red release tab toward you or upward (depending on model). The bin bottom will drop open, and debris will fall out.
- Tap the sides of the bin gently if hair or compacted dirt clings to the cyclone walls. Avoid using your fingers inside the bin while it’s open, static cling and sharp debris are common.
- Close the bin base by pushing it back until it latches. Double-check that the seal is tight.
- Reinstall the bin onto the canister body, aligning the locking tabs. You’ll hear or feel a click when it’s seated correctly.
Canister bins are more prone to residue buildup because they handle whole-room cleanups and workshop debris. If you notice a film on the bin walls, a rinse with warm water and mild dish soap works well, just let it air-dry completely (24 hours minimum) before reinstalling.
Best Practices for Mess-Free Emptying
Even with the right technique, emptying a Dyson can kick up dust if conditions aren’t ideal. A few adjustments make the process cleaner and safer, especially if you’re dealing with allergens or fine particulate.
Empty outdoors when possible. Dumping over an outdoor trash can or compost bin keeps dust and dander out of your living space. This is especially important after vacuuming drywall dust, fireplace ash, or pet bedding.
Use a trash bag with a wide opening. Contractor bags (30+ gallons) reduce spillover and contain the initial dust puff better than kitchen bags. If you’re emptying indoors, drape a damp towel over the top of the trash can to capture airborne particles.
Wear a dust mask if you have allergies or respiratory sensitivity. Fine dust from vacuuming can irritate airways, particularly if you’re emptying after cleaning areas with mold, pollen, or chemical residues. Many homeowner maintenance routines incorporate this step for whole-house cleanups.
Don’t shake or bang the vacuum. Dyson’s cyclonic design relies on precision-balanced components. Aggressive handling can crack plastic bins, loosen seals, or misalign cyclone cones, leading to suction loss.
Check for clogs before closing the bin. Look inside the cyclone shroud and bin entry port for hair wraps, fabric strips, or lodged debris. Removing these now prevents them from blocking airflow later.
Cleaning and Maintaining Your Dyson Bin After Emptying
Emptying the bin is half the job, regular cleaning prevents odor, maintains suction, and extends the vacuum’s service life. Dyson bins are made from polycarbonate plastic, which tolerates water but not abrasive cleaners or high heat.
Monthly rinse routine:
- Remove the bin from the vacuum and empty all debris.
- Rinse the bin under cold or lukewarm water. Avoid hot water, which can warp plastic and degrade seals.
- Use a soft brush or cloth to scrub the interior, focusing on the cyclone entry points and any visible dust film. Dish soap works for greasy residue or pet oils, but skip bleach or ammonia-based cleaners, they can cloud the clear plastic.
- Shake out excess water and set the bin upright on a towel in a well-ventilated area. Let it air-dry for at least 24 hours. Don’t reassemble until it’s completely dry inside, moisture in the cyclone assembly can corrode motor components and create mildew.
- Wipe down the bin seals and gaskets with a dry cloth. These rubber or silicone parts are critical for airtight suction.
Filter maintenance: While you’ve got the bin off, check the pre-motor filter (usually purple or blue foam). Rinse it under cold water, squeeze gently, and let it dry separately for 24 hours. Some Dyson models also have a post-motor HEPA filter, which may be washable (check your manual) or require annual replacement.
Cyclone inspection: Once a year, inspect the clear cyclone cones for cracks or discoloration. If you notice reduced suction even after cleaning, the cyclones may need professional service. For stubborn buildup, compressed air (from a distance) can dislodge dust without scratching plastic.
Regular upkeep aligns with guidance from product testing and review sources that emphasize the role of clean components in appliance longevity.
Conclusion
Emptying a Dyson vacuum isn’t complicated, but doing it right, at the right time, with the right technique, keeps the machine running at full power and saves you from premature filter replacements or motor repairs. Whether you’re working with a cordless stick, an upright, or a canister, the same principles apply: empty before the MAX line, work over a contained space, and keep the bin and seals clean. A little routine care goes a long way, and you’ll get years of strong suction without the hassle of clogs or odors.